What is Kubernetes and how do I set up a K3s cluster with K3Nova?
Diesen Artikel gibt es auch auf deutsch: Was ist Kubernetes….?
Kubernetes is more than just a buzzword – it’s the backbone of modern cloud infrastructures.
In this blog post, I’ll take you on an exciting journey: Together, we will build our own Kubernetes cluster with K3s step by step – consisting of one control plane (master) and two worker nodes.
You will not only learn what Kubernetes actually is and how a cluster works on the inside, but also what prerequisites you need to run it successfully yourself. And because high availability is crucial in production environments, I will also show you what makes a High Availability Cluster – and what you need to pay attention to if you want to run it in a truly stable and secure way.
First, I’ll guide you through the manual installation – so you get a deep understanding of every single step. Afterwards, I’ll introduce you to K3Nova: a tool I developed that automates the cluster setup and guides you through the process with clearly structured instructions.
Why did I develop K3Nova?
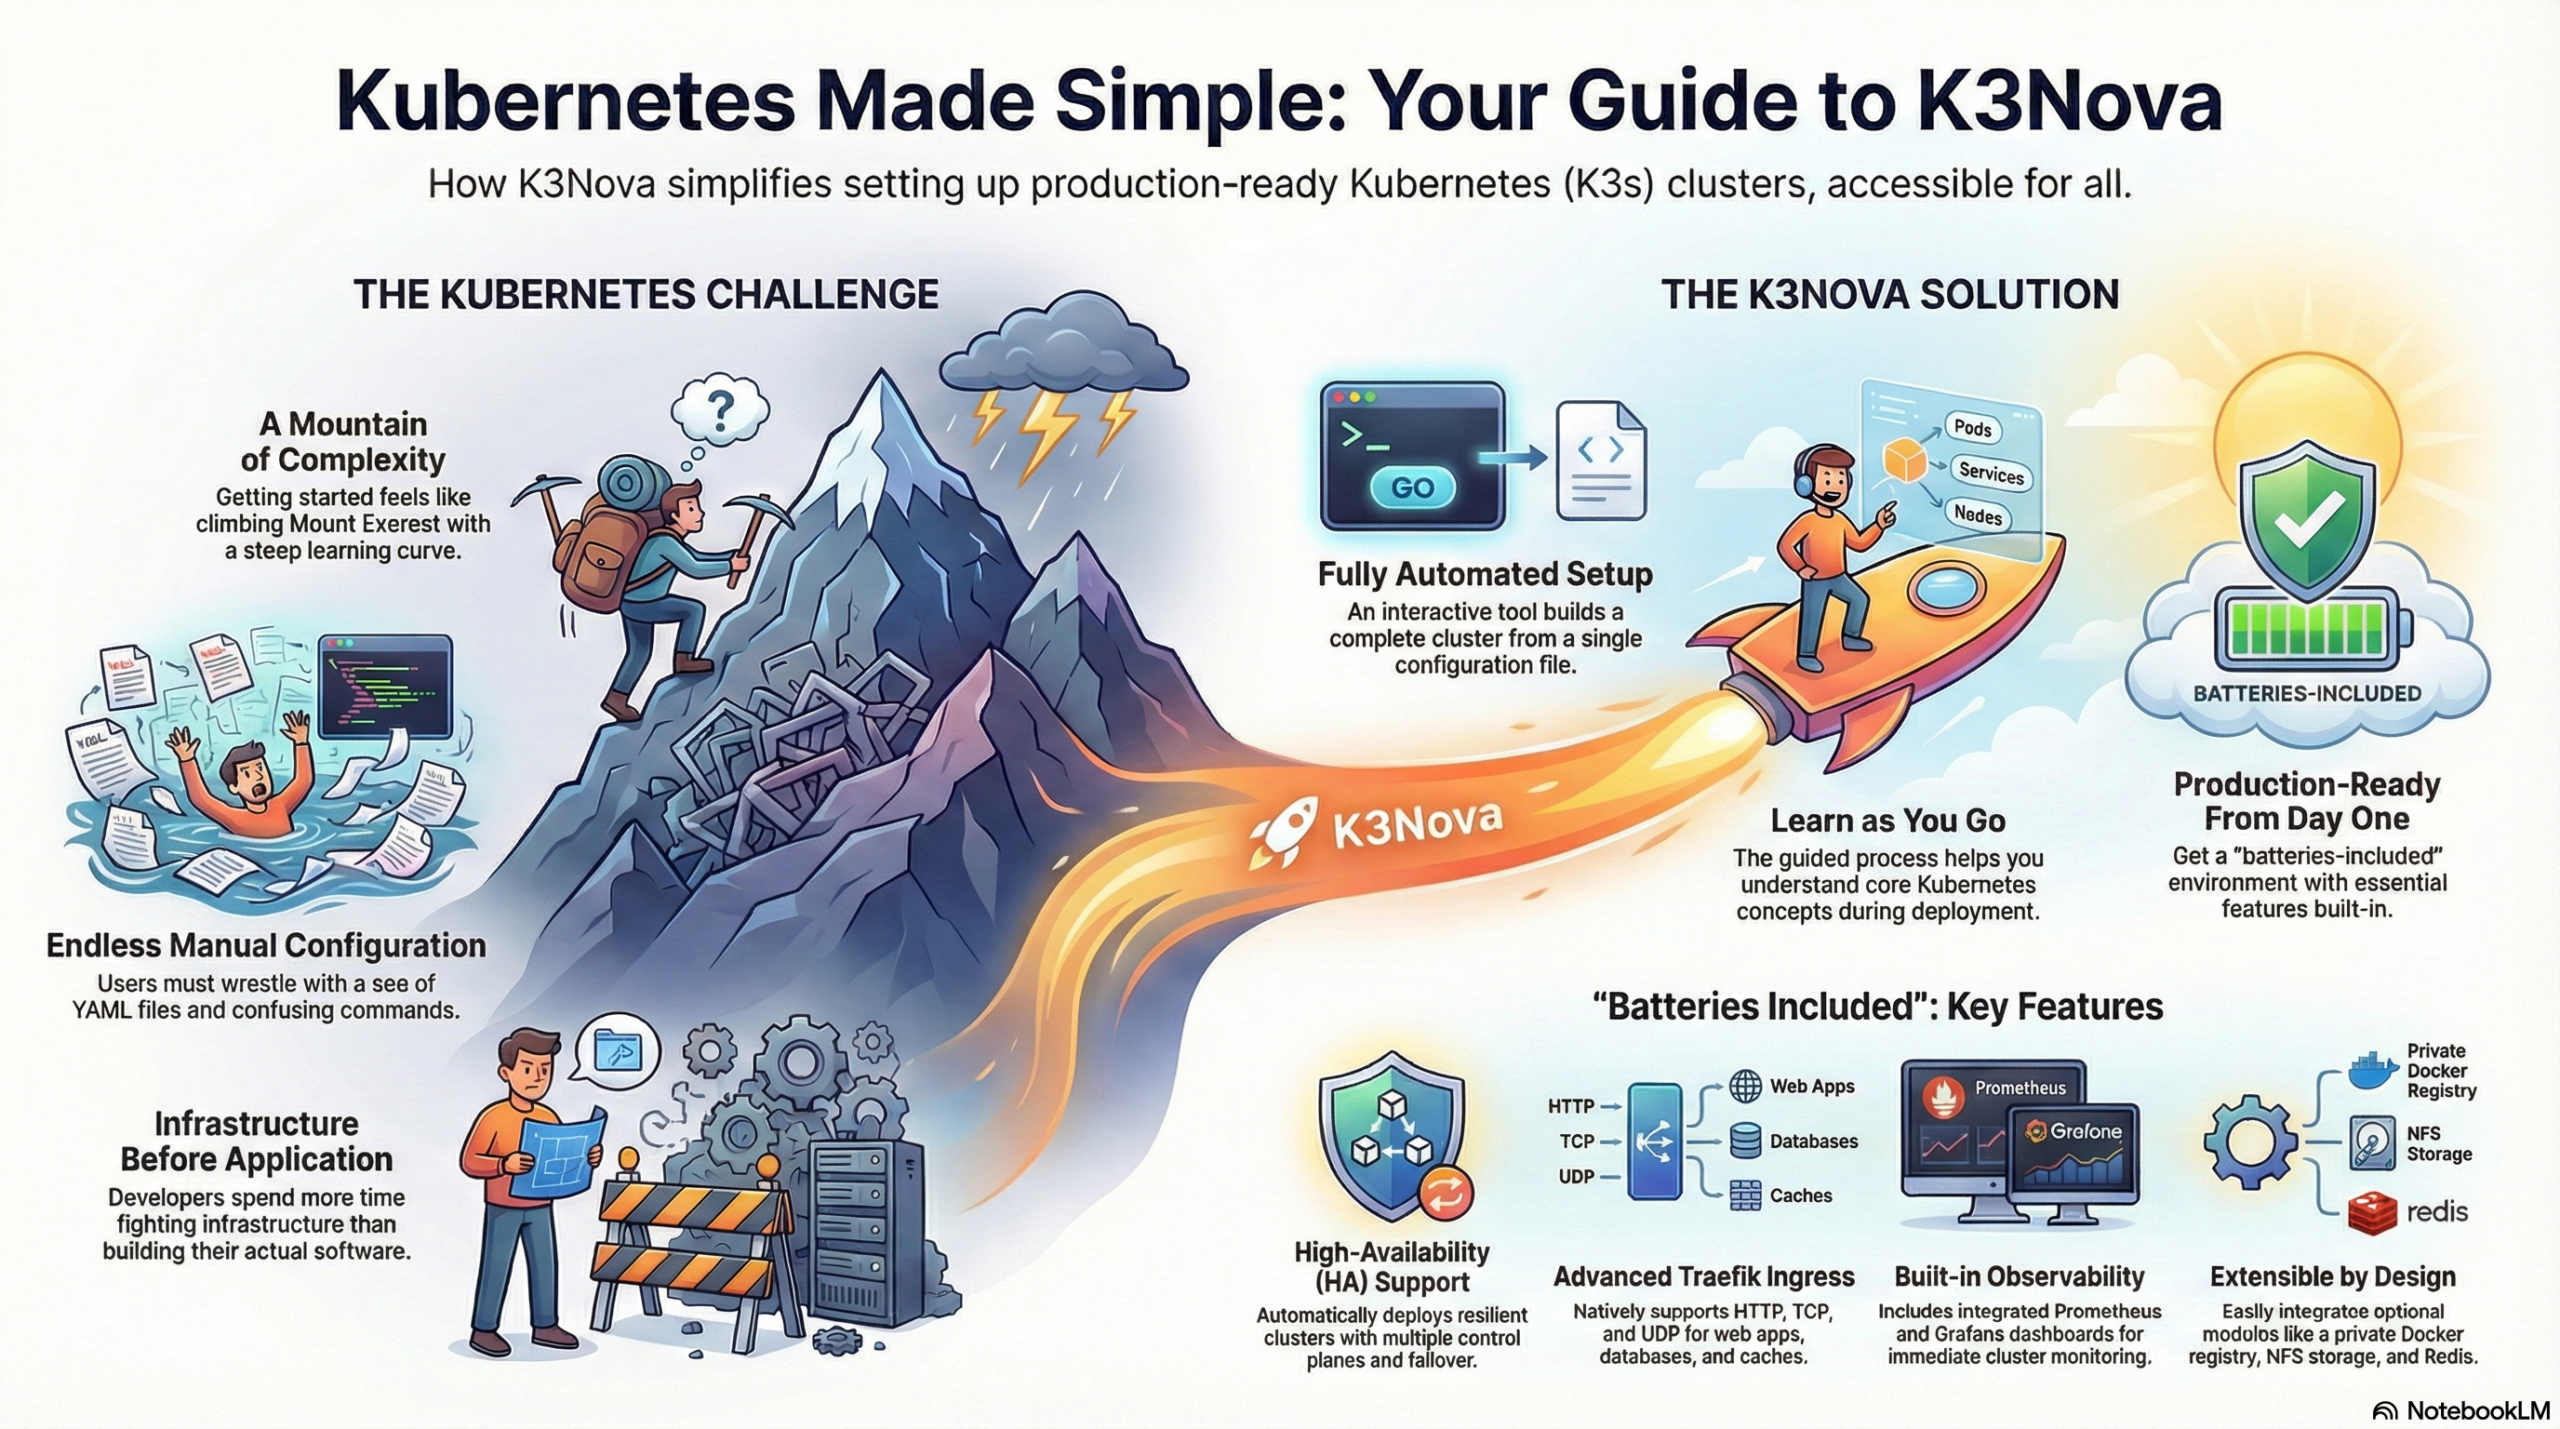
The world of Kubernetes and cloud-native technologies is fascinating – but getting started is often rocky. Complex architecture, countless YAML files, confusing CLI commands, and a seemingly endless jungle of tools and concepts. Especially as a software developer, you just want to get started: develop, test, and iterate applications. But before you can even get to that point, a mountain of infrastructure work often stands in the way.
This is exactly where K3Nova comes in:
I developed K3Nova because I am convinced that access to Kubernetes must be significantly easier – especially for developers who don’t want to become Kubernetes administrators right away, but simply need a production-like environment for trying things out and developing.
With K3Nova, I pursue three central goals:
-
Lowering barriers
I want to make it as easy as possible for you to get started in the cloud-native and Kubernetes world – whether you’re just beginning or want to deepen your knowledge. -
Fostering understanding
Through a guided, structured setup process, you will learn how a Kubernetes cluster works – from the control plane and worker nodes to topics like Ingress, Registry, NFS, and Monitoring. This will quickly give you a better feel for the concepts behind Kubernetes without getting lost in the complexity. -
Being ready to go quickly
With just a few clicks or a simple command, you can set up a complete, realistic Kubernetes environment locally – without manual configuration work, without time-consuming research. You can start developing right away – that’s exactly what K3Nova is made for.
This way, you can fully concentrate on what’s important to you: developing modern applications.
K3Nova isn’t just another tool in the endless list of Kubernetes tools.
It was born out of practice – out of frustration with unnecessary complexity and the desire to make things simpler, more understandable, and more accessible. K3Nova is for everyone who really wants to understand and use Kubernetes, without having to fight through countless hurdles.
It’s my personal attempt to build a bridge: between theory and practice, between complexity and clarity, between infrastructure and development.
If you’re curious about how a Kubernetes cluster is built, how you can run it locally yourself, and at the same time want to develop a feel for cloud-native architectures – then K3Nova is designed exactly for you.
My goal is not just to impart knowledge – I want to get you excited about Kubernetes and show you how much fun it is to build, understand, and master your own infrastructure.

Why is Kubernetes so important in the cloud-native world?
Kubernetes (K8s) is the operating system of the modern cloud. It orchestrates your containers, automates deployments, scales your applications as needed – and ensures that everything runs stably, even if individual parts fail.
In a world where software is constantly becoming faster, more distributed, and more dynamic, Kubernetes offers exactly what you need: self-healing, scalability, portability – and all of this platform-independently, whether in the cloud or on-premises.
Cloud-native means: flexible, robust, automated – and Kubernetes is the foundation for it. It makes you independent of cloud providers, gives you full control over your infrastructure, and opens the door to a huge ecosystem of modern tools like Prometheus, Helm, or GitOps.
Let’s get started!
1. Prerequisites
- Three Ubuntu servers (VMs or physical) with Ubuntu Server and root privileges
- SSH access to all hosts (password or SSH key)
- CLI: kubectl or k9s (recommended for beginners)
1.2. Set up Ubuntu Server with SSH Server
1.2.1 Prerequisites
- Ubuntu 20.04, 22.04 or newer (Server or Desktop)
- Root access or a user with
sudoprivileges
1.2.2 Install OpenSSH Server
sudo apt update

sudo apt install openssh-server -y
1.2.3 Check if the SSH service is running
sudo systemctl status sshYou should see output like:
● ssh.service - OpenBSD Secure Shell server

    Active: active (running)
If not:
sudo systemctl enable --now ssh1.2.4 Determine the server’s IP address
So you can connect later:
ip aOr:
hostname -INote the IP address of the network interface, e.g.,
192.168.1.100
1.2.5 Configure SSH server securely (optional, but recommended)
The configuration file is located at:
sudo nano /etc/ssh/sshd_configHere is a secure basic set of settings:
PermitRootLogin no

PasswordAuthentication no

PermitEmptyPasswords no

ChallengeResponseAuthentication no

UsePAM yes

X11Forwarding no

AllowUsers andrej
💡 Important: Only set
PasswordAuthentication noif public key login works, otherwise you will lock yourself out.
Apply changes:
sudo systemctl reload ssh1.2.6 Configure firewall (UFW – if active)
sudo ufw allow OpenSSH

sudo ufw enable
🔒 This allows incoming connections on port 22 (standard for SSH).
1.2.7 Test connection
On your local machine (Linux, macOS, or Git-Bash / PuTTY on Windows):
ssh kubernete@192.168.1.100If everything is set up correctly, you should be connected directly – either via password or SSH key.
1.2.8 Bonus: Change port (for security through obscurity)
Change in /etc/ssh/sshd_config:
Port 2222Then:
sudo ufw allow 2222/tcp

sudo systemctl restart ssh
And connect like this in the future:
ssh -p 2222 andrej@192.168.1.1001.2.9 Security Tips
| Measure | Description |
|---|---|
| Disable root login | PermitRootLogin no |
| Allow only specific users | AllowUsers or AllowGroups |
| Install Fail2Ban | Protection against brute-force attacks (sudo apt install fail2ban) |
| SSH key instead of password | Higher security through cryptographic authentication |
| Set up firewall | Open only necessary ports |
1.3. Download the K3Nova Binary and Prepare the Environment
Before we can start the installation, you need to download the K3Nova binary.
You no longer need to clone the repository since the precompiled binaries are directly available via the GitHub Releases.
➡ Download Page: https://github.com/AndrejSchefer/K3Nova/releases
Download the binary that matches your operating system (e.g. k3nova-linux-amd64 or k3nova-darwin-arm64) and then run the following commands:
# Make the binary executable
chmod +x k3nova-linux-amd64

# Remove the macOS quarantine flag (if required)
sudo xattr -r -d com.apple.quarantine ./k3nova-darwin-arm64

# Start K3Nova
./k3nova-darwin-arm64
In the working directory where you execute the binary, you will also find:
- The K3Nova binary – used to manage the complete cluster installation via the command line.
- Preconfigured configuration templates (e.g.
config/k3nova-config.json.tpl) that allow you to customize your cluster setup.
1.4. Customize Configuration
Create a file config/k3nove-config.json from the template config/k3nova-config.json.tpl and enter the access data for one master and two workers. Example:
{
  "control-planes": [
    {
      "ip": "192.168.56.10",       # Master node IP address
      "ssh_user": "ubuntu",       # SSH user for master
      "ssh_pass": "yourpassword",   # SSH password for master
      "cluster_init": false
    }
  ],
  "workers": [
    {
      "ip": "192.168.56.11",         # Worker node 1 IP address
      "ssh_user": "ubuntu",         # SSH user for worker
      "ssh_pass": "yourpassword",   # SSH password for worker
      "cluster_init": false
    },
    {
      "ip": "192.168.56.12",       # Worker node 2 IP address
      "ssh_user": "ubuntu",       # SSH user for worker
      "ssh_pass": "yourpassword",   # SSH password for worker
      "cluster_init": false
    }
  ],
  "k3s_token_file": "master-node-token",  # Path to token file
  "docker_registry": {
    "url": "registry.local",
    "pvc_storagy_capacity": "10Gi",
    "pass": "123456",
    "user": "registry",
    "local": true
  },
  "redis": {
    "url": "redis.local",
    "pvc_storage_capacity": "10Gi",
    "pass": "123456",
    "user": "registry",
    "image": "redis:8.0.2",
    "local": true
  },
  "nfs": {
    "network_CIDR": "192.168.179.0/24",
    "nfs_server": "192.168.179.12",
    "nfs_user": "kubernetes",
    "nfs_pass": "123456",
    "server": "10.0.0.10",
    "export": "/mnt/k3s-nfs-localstorage",
    "capacity": "100Gi"
    },
    "email": "public@andrejschefer.de",
    "domain": "igneos.cloud",
    "cluster_issuer_name": "letsencrypt-prod"
}
2. Install a Control Plane and Two workers
After you have successfully cloned the repository, you can now make the K3Nova binary for your operating system executable and start it. In the following example, we show how to set up the Linux version (k3nova-linux-amd64):
# Using Linux as an example

mv k3nova-linux-amd64 k3nova

chmod +x k3nova

./k3nova- First, the downloaded binary is renamed to make it easier to execute by command (
mv). - Then the file is made executable with
chmod +x. - With
./k3novayou start the tool directly in the terminal.
After starting, K3Nova guides you through the cluster installation interactively or based on a configuration. Make sure that the corresponding config/k3nova-config.json is in the same directory – it defines how the cluster should be built (e.g., Control Planes, Workers, NFS, Registry, Monitoring, etc.).
2.1 Install K3s Master (Control Plane)
In a K3s cluster, the „control plane“ (more technically correct, the „server node“) takes on the crucial role of controlling and managing the entire cluster. K3s is a lightweight Kubernetes distribution that aims to reduce complexity while retaining the core functions of Kubernetes.
What is the K3s Master (Server Node)?
The K3s control plane is the node that runs the Kubernetes control plane. Unlike a full-fledged Kubernetes installation, where the control plane components often run on separate machines, K3s combines them into a single binary.
The K3s control plane node is the „brain“ of the K3s cluster. It is responsible for:
- Providing the Kubernetes API.
- Storing the cluster state.
- Scheduling workloads on available nodes.
- Ensuring that the desired states of the resources in the cluster are maintained.
Without the control plane node, the K3s cluster cannot schedule new workloads or manage the cluster’s state. In high-availability setups (HA clusters), there are multiple server nodes to ensure redundancy and avoid a single point of failure. (more in section 3)
2.1.1 Manual Installation of the K3s Control Plane (Single-Node)
On the first master node (192.168.56.10), we install K3s in the role of a standalone control plane. For this, we use the official K3s installation script and specifically pass parameters to increase the security and usability of the environment:
curl -sfL https://get.k3s.io | INSTALL_K3S_EXEC="--write-kubeconfig-mode=644 --secrets-encryption" sh -s - server Important parameters in the command above:
--write-kubeconfig-mode=644allows non-root users on the master to read the generated kubeconfig (/etc/rancher/k3s/k3s.yaml). This allows you to work withkubectlas a normal user later, without root privileges.--secrets-encryptionactivates the encryption of Kubernetes secrets (in etcd/SQLite) on the server. k3s automatically generates an AES key and an encryption config that is passed to the API server (Secrets Encryption | K3s). This setting ensures that confidential data (secrets) are also stored encrypted in etcd storage.
2.1.2 Alternative: K3s Master Installation with K3Nova
Instead of manually installing the K3s control plane with the official script, the setup can also be completely automated using the CLI tool K3Nova. This tool was developed to install both simple and highly available K3s clusters quickly, reproducibly, and securely.
To install a K3s master node on 192.168.56.10 and at the same time set up the kube-config on your local machine (/home/user/.kube/config) for immediate kubectl access, please select the menu item „Install Kubernetes Master“ in K3Nova. K3Nova automatically executes the commands you manually ran above.
2.1.2.1 Installation Process
After starting the installer with:
./K3Novaan interactive terminal menu opens. There you can choose whether you want to:
- install a single master
- set up a complete cluster with master, worker, monitoring, registry, and storage components
- or configure a high-availability K3s cluster with multiple control-plane nodes
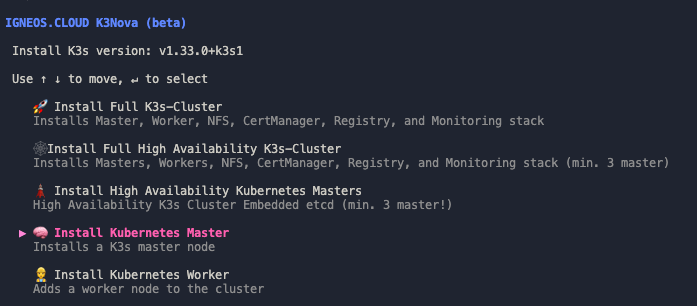
As soon as you select the option “Install Kubernetes Master” in the tool, K3Nova automatically starts the installation process. A secure SSH connection is established to the target server, through which all required commands are executed remotely.
In the background, K3Nova uses almost the same command as in a manual K3s installation – with one crucial difference: Instead of the default Traefik Ingress controller, K3Nova sets up an advanced Traefik variant that supports both TCP and UDP Ingress. For this reason, Traefik is first disabled via the parameter --disable=traefik:
curl -sfL https://get.k3s.io | INSTALL_K3S_EXEC="--write-kubeconfig-mode=644 --secrets-encryption --disable=traefik" sh -s - serverThis configuration ensures that the generated kubeconfig is readable by non-root users and that secrets are stored encrypted in the cluster.
2.1.2.2 What does „Advanced Traefik“ in K3Nova mean?
By default, K3s automatically installs a simple Traefik configuration as an Ingress controller during setup. This is sufficient for many web applications, but is limited to HTTP(S) ingress. As soon as you want to secure or publish services like Redis, PostgreSQL, MQTT, or other TCP/UDP-based protocols, this standard installation hits its limits.
K3Nova deliberately goes a step further here – and relies on an extended („advanced“) Traefik installation, that offers the following advantages:
2.1.2.3 After Installation
Once the K3s installation is complete, K3Nova automatically downloads the generated kubeconfig from the server and saves it locally. The path typically looks like this:
~/.kube/configYou can use this file directly with kubectl or set it as the KUBECONFIG environment variable to work against the new cluster.
Example:
kubectl get nodes2.1.2.4 Advantages over the manual method
Compared to manual installation, K3Nova offers the following advantages:
- Significant time savings through automation
- Consistent configuration across all nodes
- Secure storage of the
kubeconfigon the local machine - Ability to build the cluster step-by-step or completely
- Optional add-on modules like monitoring or Redis available immediately
- Reduced susceptibility to errors through tested installation logic
2.2 Install K3s Agent (Worker)
In the K3s ecosystem, the agent takes on the role of the execution „worker“ in the cluster. It connects to the k3s server (often incorrectly called the „master“), downloads, and runs pods and services. Here are the key points:
A K3s agent is a process that runs on each worker node and hosts the following core Kubernetes components:
- kubelet: Keeps pods running, reports status to the control plane.
- kube-proxy: Implements Kubernetes network rules at the node level.
- Container Runtime: By default
containerd, runs containers.
The agent registers the node with the server, monitors the node’s health, and executes all assigned workloads.
Main tasks of the K3s Agent
- Node RegistrationEstablishes a secure connection to the server on startup (via TLS) and registers itself with a token or certificate.
- Pod ManagementThe kubelet process on the agent receives pod definitions from the API server and starts or manages the corresponding containers.
- Network Mediationkube-proxy handles service IP routing and load balancing on the node.
- Health ChecksPerforms liveness and readiness probes and reports the status back.
- Log and Metric CollectionForwards logs and node metrics to monitoring components if necessary.
2.2.1 Manual Installation of a K3s Agent
On the worker server (192.168.56.11), run the k3s installation script so that it connects to the master:
First, we need the cluster token for authentication.
You can find this after the master installation in /var/lib/rancher/k3s/server/node-token on the master. Copy the content of this token securely (e.g., via SSH):
# On the Master Node (192.168.56.10): Read token
cat /var/lib/rancher/k3s/server/node-token
# Example output (do not use for real):
K1066b9f4e97c2e87ea47d6facf56e76828e62198e1f908d58e29cce355956f9c::server:37c672b9c9d3f9f4dce7f297bef856d1
Now execute the following on the worker (replace <MASTER_IP> with 192.168.56.10 and <TOKEN> with the copied token string):
# Execute on the worker node (insert Master IP and Token):
curl -sfL https://get.k3s.io | K3S_URL="https://<MASTER_IP>:6443" K3S_TOKEN="<TOKEN>" sh -s - agent
This command installs k3s in agent mode and connects the node to the master API server on port 6443 using the token. When the installation is complete, check the nodes again on the master
# Back on the master (with KUBECONFIG set):

kubectl get nodes -o wide
You should now see two nodes listed – the master (192.168.56.10) with the role control-plane and the worker (192.168.56.11) as agent – both with STATUS „Ready“. The basic cluster is now set up.
YOU MUST PERFORM THIS PROCESS ON EVERY SERVER
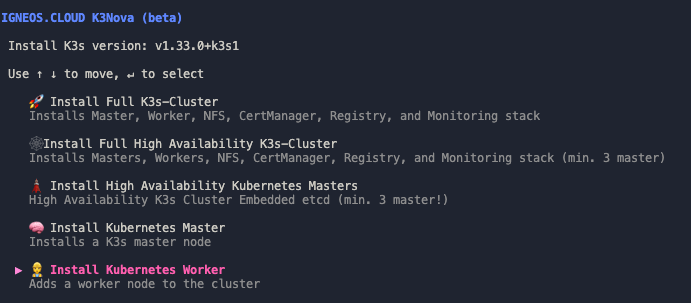
2.2.2 Install K3s Agents with K3Nova
Alternatively, you can handle the process via K3Nova. It retrieves the required token from the master and automatically sets up the K3s agents on each individual VM.
2.3 Differences from the K3s Server (“Control Plane”)
| Feature | k3s Server | k3s Agent |
|---|---|---|
| Control Plane | Contains API server, scheduler, controller manager, and backend (SQLite or external DB) | Only execution plane (kubelet, kube-proxy) |
| State Store | Persists cluster state | No Local Store |
| API-Endpoint | Provides API endpoint on port 6443 | Consumes API via agent connection |
| Cluster-Init | Executes k3s server initially |
Executes k3s agent to join |
| Roles | Control Plane & optionally also workloads | Only worker, no control plane |
2.3.1 Summary
- k3s Server („Master“) provides the control plane and API endpoint, stores the cluster state, and manages scheduling and controllers.
- k3s Agents are the worker nodes that run kubelet, kube-proxy, and the container runtime to execute pods and handle network routing.
- The separation allows for scaling: More agents for more workloads (What is a workload?), while the server handles central control.
With this division, k3s remains lightweight and particularly suitable for edge and IoT scenarios.
3 High-Availability Setups (HA-Cluster)
A high-availability setup (HA cluster) increases the fault tolerance of your Kubernetes cluster by operating multiple master nodes in parallel. If one master fails, the other master nodes automatically take over the control and management of the cluster. This avoids a single point of failure. A typical HA setup consists of at least three master nodes to be able to make quorum decisions and reliably secure the cluster state.
3.1 Installation of the K3s Cluster in a High-Availability (HA) Setup
A high-availability cluster ensures high availability and fault tolerance for your Kubernetes cluster. For our example, we use a setup with three master nodes (Control Plane) and an integrated etcd cluster to manage and synchronize the Kubernetes database.
Our servers have the following IP addresses:
- Master-Node 1:
192.168.56.10 - Master-Node 2:
192.168.56.11 - Master-Node 3:
192.168.56.14
3.1.1 Manual Installation of the HA Setup with its own etcd database:
3.1.1.2 First Master Node (Control Plane)
On the first master node (192.168.56.10), we install K3s and initialize the cluster with it. This step starts the first control-plane node with an embedded etcd database, thus forming the foundation for a high-availability setup.
curl -sfL https://get.k3s.io | INSTALL_K3S_EXEC="server --cluster-init --write-kubeconfig-mode=644 --secrets-encryption" sh -Important parameters in the command above:
--cluster-initThis parameter initializes the etcd cluster, which is the central database of the Kubernetes cluster. The node on which this command is executed becomes the first member of the etcd cluster replication and assumes the role of a leader (until replication eventually occurs). In an HA setup with multiple control-plane nodes,etcdforms the backbone of cluster consistency: all control data such as deployments, pods, secrets, ConfigMaps, or cluster states are stored here.--write-kubeconfig-mode=644This parameter ensures that the generated configuration file (/etc/rancher/k3s/k3s.yaml) is saved with file permissions 644. This ensures that non-root users can read the file and thus usekubectlwithout needing root privileges.--secrets-encryptionWith this parameter, the encryption of sensitive Kubernetes data (e.g., secrets) in the etcd database is activated. K3s automatically generates an AES key and a correspondingencryption-config.yaml, which is passed to the API server. This ensures that, for example, passwords, tokens, or certificates stored as secrets do not end up in the database in plain text.
Note: This node will be the first of at least three control-plane nodes in a high-availability etcd cluster. All other control-plane nodes will later connect to this initialized cluster.
3.1.1.2 Add more Master Nodes to the Cluster
After the first master node has been successfully initialized with etcd, the two other control-plane nodes can join the existing cluster. To do this, you need the token from the first master, which is located at the following path:
Show token on the first master node (192.168.56.10):
sudo cat /var/lib/rancher/k3s/server/token
Copy this token – it will be needed shortly to connect the new master nodes correctly.
Installation on the other master nodes (e.g., 192.168.56.11 and 192.168.56.12):
Now execute the following command on the two additional nodes. Important: You must only use the parameter --cluster-init on the first master – it is omitted on all others!
curl -sfL https://get.k3s.io | INSTALL_K3S_EXEC="server \
  --server https://192.168.56.10:6443 \
  --token <TOKEN> \
  --write-kubeconfig-mode=644 \
  --secrets-encryption" sh -
Replace <TOKEN> with the previously copied value.
Explanation of the most important parameters:
| Parameter | Description |
|---|---|
--server https://192.168.56.10:6443 |
Specifies the address of the initial master node to which the new node connects. |
--token <TOKEN> |
Authenticates the new node to the existing cluster. |
--write-kubeconfig-mode=644 |
Also allows non-root users to access the kubeconfig. |
--secrets-encryption |
Activates the encryption of Kubernetes secrets (e.g., in etcd), just like on the first master. |
Once all three master nodes have joined correctly, your high-availability K3s control-plane cluster is completely set up.
3.1.1.3 Completing the Installation
After a successful installation, you can check the cluster status with the following command:
kubectl get nodesAll three master nodes should appear with the status Ready. This HA setup ensures that your Kubernetes cluster remains available even if individual nodes fail.
![]()
Now you can install additional K3s agents for your HA cluster as described in section 2.2.
3.2 Alternative: Automatically set up a high-availability K3s cluster with three control-plane nodes – with K3Nova
The manual setup of a high-availability (HA) K3s cluster with multiple control-plane nodes is not only time-consuming but also error-prone. For each control plane, specific configuration steps must be followed – from initializing the etcd cluster and setting environment variables to the network communication between the nodes.
To save you this effort, you can use K3Nova. With just a few inputs, the installer installs:
- three or more fully configured control-plane nodes,
- an internally replicated etcd cluster (to protect against data loss and failures),
- a consistent cluster topology that is immediately ready for production use.
The tool not only handles the cluster initialization but also ensures that all control planes are correctly connected to each other, are aware of each other, and a functioning leader is elected in the etcd cluster.
Advantages at a glance:
- No manual setup of etcd or
cluster-init - Uniform configuration of all nodes
- Minimization of error sources
- Time savings and increased reproducibility
3.2.1 Configuration File
To set up a high-availability K3s cluster with multiple control-plane nodes, you must enter at least three nodes in the config/k3nova-config.json file.
Important: For the first node, set the value in the cluster_init field to true. This will cause the K3s installation on this node to be performed with the parameter --cluster-init, which leads to the initialization of the internal etcd cluster.
All other control-plane nodes must be marked with cluster_init: false – they join the cluster after the first node has been successfully initialized.
Example configuration (config/k3nova-config.json):
{
  "control_planes": [
    {
        "ip": "192.168.179.10",
        "ssh_user": "kubernetes",
        "ssh_pass": "123456",
        "cluster_init": true        # set true for insta
    },
    {
        "ip": "192.168.179.11",
        "ssh_user": "kubernetes",
        "ssh_pass": "123456",
        "cluster_init": false
    },
    {
        "ip": "192.168.179.14",
        "ssh_user": "kubernetes",
        "ssh_pass": "123456",
        "cluster_init": false
    }
],
  "workers": [
    {
      "ip": "192.168.56.13",
      "ssh_user": "kubernetes",
      "ssh_pass": "123456",
      "cluster_init": false
    },
    {
      "ip": "192.168.56.12",
      "ssh_user": "ubuntu",
      "ssh_pass": "yourpassword",
      "cluster_init": false
    }
  ],
}- The field
cluster_init: truemay only be set for a single control-plane node – specifically, the one that starts theetcdcluster. - The installer uses this file to automatically configure all nodes correctly via SSH and build the cluster.
- The
ssh_userandssh_passfields must be valid on all hosts and have sufficient permissions for administrative tasks.
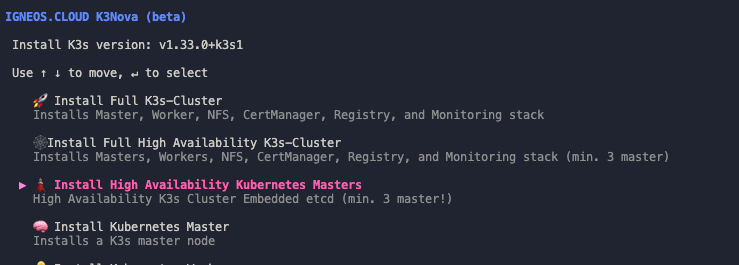
Start K3Nova and select the „Install High Availability Kubernetes Masters“ option
3.2.2 Completing the Installation
After a successful installation, you can check the cluster status with the following command:
kubectl get nodesAll three master nodes should appear with the status Ready. This HA setup ensures that your Kubernetes cluster remains available even if individual nodes fail.

Now you can install additional K3s agents for your HA cluster as described in section 2.2.